I originally wrote this article to help out a couple of new instructors at the UF scuba program. I am releasing it to the public for any other new instructor.
Successful OW Checkout Dives
By Ken Sallot
There’s a saying, “failure to plan is planning to fail.” Given that scuba diving is a recreational activity that can be dangerous, or fatal, it’s important to be properly prepared to lead and conduct the open water student evaluations. This article is not all encompassing, but will cover many of the key points necessary to have a successful session. It is my hope that you can use it to help be prepared, and give you an opportunity to think about the types of scenarios you may encounter.
NAUI Requirements for Certification
NAUI requires every student to be evaluated through a minimum of four open water dives. Prior to the standards update in December 2012, NAUI required a minimum of five open water dives, or four open water dives and a skin dive. UF continues to use the five open water dives for their certification matrix.
Per NAUI standards, you may not conduct more than three dives on any given day. If a third dive is to be conducted on a given day, you may not exceed 40’ for that dive, and you may not engage in any out-of-air ascent training exercises on that third dive. This means you may not conduct alternate-air-ascents or controlled emergency swimming ascents on the third dive in a day.
To be counted as an open water dive, NAUI requires that you have one entry and one exit, and your underwater activity conducted while breathing scuba last for at least 20 minutes at a depth of at least fifteen feet. If the conditions are unfavorable, you may have multiple entries and exits to achieve the minimum time. To quote the NAUI S&P, “For example, an excursion involving an entry, 12 minutes of underwater activity on scuba, and an exit, followed by a later entry, eight minutes of underwater activity on scuba, and an exit would comprise one scuba dive. A series of excursions in a course involving 80 minutes of underwater activity on scuba would comprise four scuba dives.”
The minimum SIT time between two dives is 10 minutes.
The student to instructor ratio is 8:1 in ideal conditions. If you have a certified DM you may go up to 10:2, and if you have two DM’s you may go up to 12:3. You may not expand the number beyond students no matter how many DM’s are with you. If the conditions are less than ideal, such as poor visibility in a lake, high current, or rough seas, the ratios should be reduced. The students are to be under DIRECT supervision of an instructor at all times, this means the instructor is in the water with the group and can halt any activity that could cause harm to the student.
Equipment considerations: You MUST have a snorkel. The minimum equipment to be worn by students includes: mask, fins, snorkel, tank, regulator w/pressure gauge and octopus, bcd with low pressure inflator. Instructors must have the same equipment PLUS a timing device, depth gauge, knife, emergency signaling device (whistle / mirror / smb). A compass is required with visibility less than 10’. And a quote from the S&P: “Instructors and dive leaders must also be similarly equipped as their students are during training, i.e., when students are using open circuit scuba, the instructor must also use open circuit scuba.” This means that if you are teaching students that will be using a single cylinder in a backmount configuration, then you must be wearing the same configuration (no doubles, no sidemount).
The skills a student must demonstrate in order to be certified include several “subjective” skills, such as being able to be a safe diver, responding correctly to signals, and properly using the buddy system. It is worth spending a few minutes to review all of the required skills in your NAUI S&P.
Other skills that a student must demonstrate:
- Orally inflate / deflate self and buddies BC
- At the surface, remove and replace each of the following: mask, fins, weight belt, scuba unit.
- With face submerged, breathe through snorkel while resting and swimming.
- Self and buddy cramp releases
- Safety stop
- Mask clearing, including removal and replacement
- Regulator recovery from behind the shoulder (“reach” method)
- Hovering
- Unclasp and adjust the weight belt underwater
- Underwater navigation with a compass
- Measure, record, and calculate individual air consumption as surface air consumption rate using a submersible pressure gauge, depth gauge, and timing device.
- Perform a dive at a depth between 40 and 60’.
- Use the NAUI tables to calculate repetitive dive information (LG, SIT credit, RNT)
- Transport for a distance of at least 50 yards a budy who is simulating exhaustion.
- From a minimum of 15’ share air and ascend in a controlled manner with another diver both as the donor and recipient.
- Perform a relaxed, controlled, emergency swimming ascent (CESA) from a depth of at least 15’.
- Bring a diver simulating unconsciousness to the surface from a depth of approximately 10’. Remove weight belt, mask, and snorkel. Simulate in-water rescue breathing.
Whew, that’s a lot! But you can get it all knocked out over two days, and still have time to take the students for a tour if you are organized and prepared.
Beginning of the day
You will need to prepare and bring some equipment for a successful weekend. Bring with you the following:
- The roster of students that are diving that day.
- Their student record folders (and verify they are properly filled out)
- An O2 kit
- A first aid kit
- A “save a dive” kit (spare gear, parts, and tools). I bring a spare BC, several pouches of soft weight, and a spare regulator on top of a normal save a dive kit.
- Writing utensils
- A dive slate properly prepared for the activities
Make sure the students know when and where you are meeting them. Manatee springs has a limit on the number of divers that can dive in a given day, and we have been running into other groups as early as 7:30AM. A backup plan to Manatee would be either Troy Springs (deep), or Fanning Springs, which is approximately 10 miles north of Manatee. Please note, Fanning is barely 18’, so while you will meet the minimum depth standards…
You should endeavor to be at the site at least 10 minutes prior to the time you announced to the class. As a scuba instructor you are a diving professional, act like one.
Some students will be there before you. Some students will be there much later than you told them to be there. This is just the way it is, think of it like herding cats. You may have some success by telling students if they are not there by XX time they will not be able to dive, but that will not always work.
As you are waiting for the few late arrivals, you can use the time to go over the waiver reaffirmations with your students. They are part of the NAUI student folder, and basically it is an opportunity for the student to re-attest that they are aware of the risks and wish to continue with the scuba training.
Site Briefing
Once you have collected all of the students and checked into the dive site, it is a good opportunity to give a broad site briefing. Take the students on a walking tour of the dive site, giving a description of the site. Briefly describe the depth of the site, and notable features such as entries and exits. During the tour, also discuss emergency procedures, spare gear, O2 locations, and an overview of the days events.
Some students will likely want to go to the restrooms upon arrival. Maintaining control of the group is important, if you decide to let one or two wander off then others will wander off as well and eventually you will have lost control of the group. If you decide to let the one or two people use the facilities, then go ahead and let EVERYONE use the facilities but give them a deadline on when to return – “there are the restrooms, everyone you MUST be back here in ten minutes so we can do our site briefing.”
At Manatee Springs I like to perform my site briefing in the following manner:
Gather the group in the parking lot, do a head count to make sure everyone is there, then tell them where we are and how many dives we will conduct. I mention there are two sites, and then bring them to Catfish first. On the walk over to Catfish I mention how many groups there will be, and talk about the order of the dives. Once we arrive at Catfish I give a description of the sink, pointing out the duckweed surface and how it’s clear underneath (I save the “how to exit” part until the actual dive because the students will forget it anyway), but I do mention that the bottom is silty and I talk about the cave system. I usually tell my students if I ever catch them in the cavern I will kick them out of the water and fail them, but I explain to them that this is for their own safety. I also point out the shower right next to the deck.
I then take the students as a group to Manatee and continue the briefing there. While walking over to Manatee I may discuss things like ticks, or mosquitoes, or Bubba’s depending on what I see around me. Once at the head spring I make a point to discuss how strong the flow is, and how divers can be propelled from 25’ to 12’ very quickly and that it’s important to exhale; I usually tell them to “shout WHEEEEEE! At the top of your lungs!” as they are being pushed by the current.
After Manatee, I walk them over to the snack shack / concession area to show them where the restrooms are and point out they need to wash their feet before going in to use the facilities. I usually comment that the rangers get upset when people track mud in there, and I don’t want to hear about UF students being the problem. I also show them where to wash their booties/shoes.
And this is where I conclude my site briefing. I will point out that they are now at the restrooms, and that we will regroup in the parking lot in 10 minutes to start gearing up and getting ready.
Pre-dive Briefing
Once the students have been split up, and we are ready to begin diving operations it is time to do a pre-dive briefing. You should ALWAYS conduct a pre-dive briefing for every single dive, and you need to be very detailed during the briefing. Make sure all of your students are there and paying attention during the briefing.
EVERY pre-dive briefing should include the following:
- Entry and exit locations, as well as ascent and descent.
- Establish the limits of the dive (every dive has three limits: depth, time, pressure).
- Describe the bottom conditions – give them precautions for the environment (silt?)
- On the first dive of the day review ALL signals you care about. Up, Down, OK, Uneasy, Ears, Pressure, Counting (I usually just have them show me their gauge), Out of Air, Buddy, Look, Follow, Hover, Stop, Slow Down, Speed Up, Low on Air, Turn-Around, Turn-Around based on limit (I use a T). For every dive you should review any signals specific for the skills on the dive (different UF instructors have different signals for mask removal / replacement for example).
- Before every dive, describe the skills/activities you will have them perform, and be very excruciating in the detail: “I will arrange you in a semi-circle around me, then will come up to you one by one and ask if you are OK. If you are, then I will hold on to your shoulder strap just to help control your buoyancy, and then I will ask you to partially flood your mask. Remember, the spring water will be colder than the pool, so don’t let that startle you. After you have cleared your mask, I will ask you to remove your mask and then clear it. Once you are OK, I will then move on to the next person and repeat the process. The rest of you, when I am working on the skills, you are to just sit there and watch us.”
- Talk about any emergency contingencies; for instance, if you do not have a DM that can monitor the group in the event a student bolts on you, then you may choose to say something like “if I have to ascend to the surface for any reason, you all must come up too because you are uncertified divers and you can not be diving alone.”
Check their gear, and make sure they all have enough air for the dive. You should never let a student begin a dive with less than 1500 psi, realistically probably not less than 2000 psi.
Conducting the dive
FILO! First In, Last Out. This statement is about YOU the instructor. You should be the first person in the water, and you should be the last person out of the water. If you are already in the water, you can assist students that are having problems as they enter, but if you are not in the water then you cannot render assistance. I cannot count how many times I have had to grab a student and physically swim them back to a trail line in a swift current in the ocean, or had to stop a student from going diving solo. Being in the water first makes these tasks easier.
The risk to FILO is that it’s possible that a student may have a problem on land (broken fin/mask strap, forgot weight belt, etc). This is one reason why you should do a gear check of your students before getting into the water. If you have an assistant, you can have them be the last one in the water so that they can help with these problems.
During any training dive, the most likely place for student / instructor separation is during the descent and ascent. Invariably, especially in either rough seas, strong current, or cold water, there will be one student that has problems equalizing their ears. I like to use a descent line to minimize this problem, I tell my students that we will descend down the line as a group; if one person has problems, we bring the entire group up.
If you are diving in the ocean with a strong current, it is a good idea to tell the students to hold onto the descent line, otherwise they will not be able to fight the current. If any of them are not holding onto the line, grab their hand and put it on the line. Do not be afraid to ask the mate on the boat to run a granny line to the bow for a controlled descent.
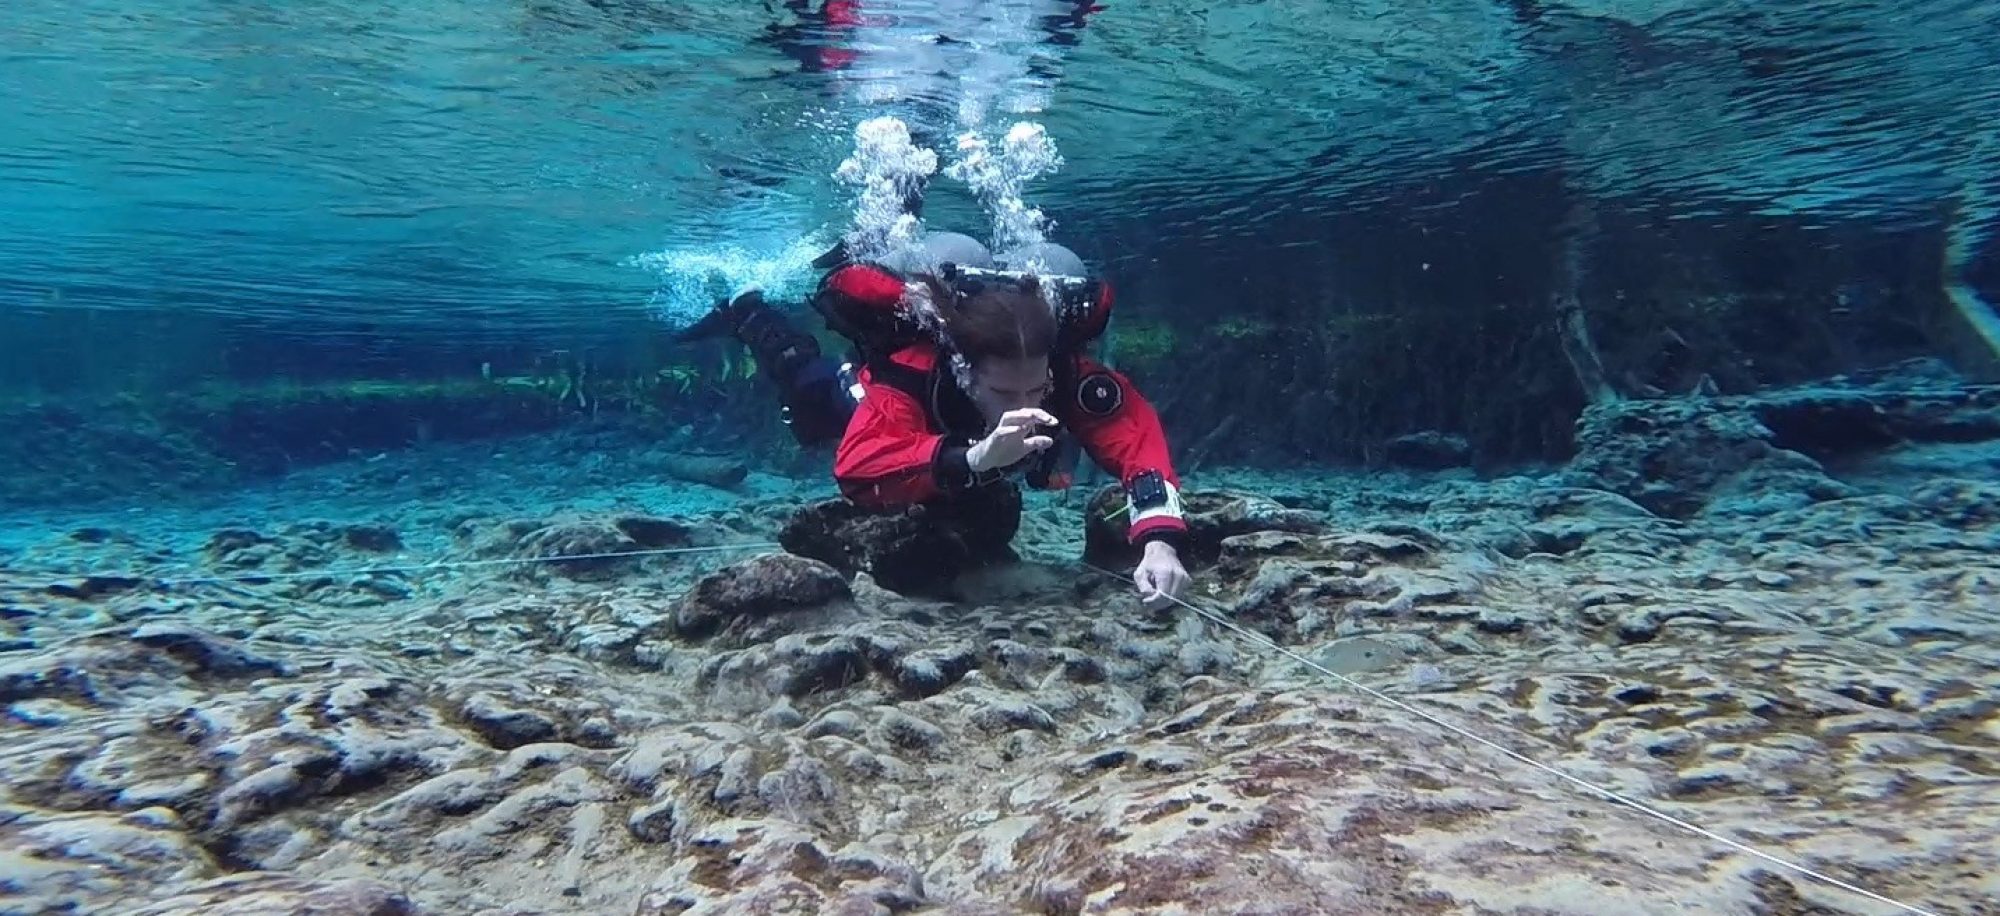
Once everyone is on the bottom it is time for the skill evaluation. In Manatee, I usually arrange them in a semi-circle around me outside of the flow. I will go to each student one by one, ask if they are OK, if they are then I will grab hold of their BC with my left hand and have them run through the skill sequence. My right hand is usually holding onto my octo, or otherwise prepared to grab a regulator and shove it in their mouth in the event that something goes wrong.
If we are doing multiple skills, I will have each student do all of the skills before moving to the next. If they struggle a little bit that is OK, they are probably not used to wearing wet suits and being in the cold spring water will feel different to them. But obviously, don’t let them sit there struggling with a regulator recovery for 2 minutes before giving them a regulator to breathe. Make sure to congratulate them for successful skills! And don’t be afraid to ask them to repeat a skill you are unhappy with.
Remember, you are evaluating the students, not teaching them; there should be no reason for you to demonstrate any skills on the day of check-out dives. If they could not display mastery of a skill in the confined water, then they should not be allowed to participate on a check-out dive.
I usually check all of the students air supply every couple of minutes. Perhaps between every other student that you evaluate, i.e. evaluate student 1 & 2, check all air, evaluate 3 & 4, check all air, evaluate 5 & 6, check all air. If someone is going through their air quickly, perhaps move to them sooner and then have the DM escort them to the surface when their air is low.
If you have an assistant with you, make sure to have them watch the entire group. They can be behind the group ready to spring into action in the event they are needed.
If you do not have a DM your attention will be focused on the student that you are evaluating. Try to keep an eye on the rest of the group peripherally, but realistically, if a student has their regulator out of their mouth or their mask off their face, you are 100% focused on them. After completion of each skill look around to the rest of the group to see what they are doing, and make sure they are not getting into too much trouble.
If there is a problem and a student bolts, you MUST slow them down as much as possible and ensure they are exhaling to avoid harming themselves. Seriously, punch them in the stomach to force them to exhale if you need to. If you have a DM, he can collect the rest of the group and bring them to the surface. If you don’t, well let’s hope you told all of your students that they need to ascend if you need to ascend in an emergency…
After the evaluation is over, check all of the students air supply, and if there is plenty left and you are still under the 20 minute mark, do a brief tour. Eventually, regroup to the down line and begin your ascent as a group. Make sure they are properly controlling their ascent rate, and not doing elevator rides on their way up.
Post-dive evaluation
I like to do a post-dive review on the surface while everything is fresh in my head. For specific behavior that could be dangerous (elevator rides, for instance), I will go ahead and single the person out but make sure everyone understands why the behavior is risky. For general issues, I will just speak about them to everyone. Also highlight GOOD behavior and publicly praise.
Specific Skills
- Mask Clear – I usually begin with a mask flood then a removal and replacement. You MUST be holding onto the student in case they bolt.
- Regulator Recovery – I start with the sweep method then do the tank tilt/reach method. You MUST hold onto the student. I usually hold onto my octo with my right hand in the event the student struggles with finding their reg and I need to shove a regulator in their mouth, and hold on to them with my left hand.
- Weight belt removal – You should hold onto the student in the event they lose their weight belt.
- Gear removal and replacement @ the surface – I usually do this as a surface interval between two dives. I start with having them take their fins off, then put them on, then their weight belt off, then put it on, then their BC off, then sit on top of it, then put their BC back on (they may need to deflate it a little), then finally the coup de gras is taking their mask off, and putting it back on.
- Out of air share – Each person must be the donor and recipient. I usually have them get into the air share position, then ascend as a group. Once they ascend, the donor orally inflates the BC of the out of air diver (thus combining two skills!). We then stow the octopus, switch who will be out of air, descend, and do it again. I usually use this skill as the last thing on the dive, so we will have already done the other skills then a tour, then I point to one person from each buddy pair and say “you are out of air”, etc.
- CESA – The key here is controlled. They can ascend as fast as 40’ per minute during this skill, but they need to be in control. The student must ascend a distance of 15’ while exhaling a continuous breath of air, but they can only do the skill on one breath. You MUST give a very good briefing of this skill, and make sure they understand the skill. You MUST perform this skill using a fixed down line so that you can arrest the ascent in the event of an emergency. You should have one hand holding on to the down line, and one hand holding on to the student during this skill. The student keeps the regulator in their mouth with their left hand on their BC inflator/deflator to control their ascent during this skill. I usually hold onto them with my right hand, and give them a 3 second count down (3-2-1, UP!) with my left hand while resting the line in the crook of my left elbow. When the student begins their ascent I position my left hand around the line ready to grab hold it to halt their ascent. I always tell my students to get a good breath of air when I give them the UP signal then hum loudly on the ascent, but I rarely hear them if I am wearing a hood, so I have to also watch for bubbles as they exhale. If they are not exhaling, I stop them. If they take a breath, I stop them and make them go back to 15’ to repeat the skill. I usually do this skill at the beginning or end of a dive, and leave the other students on the surface while I conduct the CESA individually with each student. You should never leave uncertified divers unattended on the bottom!
- The are descriptions of the other skills in the NAUI S&P, also feel free to ask any of us, we will be more than happy to share.
Sample Schedule
I write out the dive’s and the skills I will have them do on my slate. I also write out their names on the other side, this helps me with their names in the event I am diving another instructors students. My slate looks something like this (text in RED is not written on the slate):
Day 1: Dives 1-3 (Local Springs)
Dive 1
Snorkel to down line
Mask clears
Regulator Recoveries
Weight Belt Removal & Replacement
Tour
Out of Air Share (both)
During the SIT we will go over logs and tables. This allows us the chance to do their SAC rates as well as their letter groups. Swap tanks.
Dive 2
CESA <- get it out of the way at the beginning, but your ears will be ringing after 8 of these…
Hovering / tour
Rescue (both) <- During the rescue I have them do a do-si-do tow for 50 yards
Surface Gear Removal
Cramp Releases
During the SIT we will stay in the water and do surface gear removal and replacement and cramp releases.
Dive 3
Hovering / Buddy System
Just do a tour dive. They have had a busy day, let them relax. The water level has been so high in Manatee that we’ve done some nice dives throughout the cypress knees in July.
After the dive, log all dives and activities over lunch as a group!
Day 2: Dives 4-5 (Keys)
Group control on Dive 4 & 5 is really critical. We can have rough seas, poor visibility, and high current, so you need to make sure to follow FILO and give a very detailed pre-dive briefing before beginning each of these dives. As part of that briefing, you should stress to your students that they need to stay with you as a group, that they should use the down line, and that they should monitor their air and let you know if they are running low.
Dive 4
Deep dive (40-60’).
Tour
Safety Stop
Dive 5
Compass Navigation Dive <– send them out on a heading (or natural navigation) for 10-15 kick cycles.
I usually then take them on a tour, then write the following in my wet-notes if I am comfortable with them, “congratulations, you have just passed. You may go off with your buddy but be back here within X minutes or no less than Y psi.” I adjust X and Y to the situation, such as their current air, how long we have been down. I usually try to let them go for about 10 minutes, but not too much more than that.
Post dive, we will go grab lunch and fill out logbooks, handout c-cards. Usually Mike K. is snarling about the logbooks.
Then it’s party time in the keys with the cookout… Maybe if you’re lucky, someone will bake slutty brownies.