So you need a primary light?
A question I get asked frequently is “what primary light should I buy for cave diving?” Although light and battery technology is constantly changing, I am going to explain some general guidelines for things to look for in a primary light that will hold true no matter what lights are on the market in the coming years.
Primary Lights Are Life Support Equipment
The first thing I want to address is the basic tenet that lights used in cave diving are life support equipment. Caves have no natural light and cave diving is hard on your gear so you want a light that will provide you with ample lighting and can handle the rigors of cave diving.
This means you should plan on making an investment in a quality dive light from a reputable manufacturer. For a person that is interested in cave and technical diving in North America, I would look at lights made by Dive Rite, Halcyon, Light Monkey and Underwater Light Dude. All four manufacturers have solid products with great customer support and they develop their products with cave diving in mind.
Let me be very frank with you. Primary lights break and eventually it is likely that yours will break too. In 13 years of active cave diving, over a 22-year period, I have yet to own a light that has never failed on me.
Halcyon? Yup, had one fail. Dive Rite? Yup. Light Monkey? Yup them too. And although I’ve never owned an Underwater Light Dude, I know a couple of guys that had failures with theirs too.
In most cases, the failures are wear and tear items – batteries eventually die, light cords and switch boots need periodic replacing, etc. But occasionally the failure may be more dramatic (I blew up an LED emitter once). By having a light that was made by one of the companies listed above, I know that when it breaks, getting it fixed will be quick and easy.
I also know that any light made by one of those four manufacturers will have excellent build quality, fit and finish. It will be well made and should be able to handle a fair amount of wear and tear (i.e. abuse) from cave diving.
Sure, you may save some money up front by buying a cheap foreign made light, but the amount of frustration and aggravation you will encounter due to lost diving opportunities and time spent fiddling with the gadget will more than eat up any savings. And wouldn’t it stink to find out that the company that manufactured your light disappeared overnight and now you can’t get it fixed?
If you go the “cheap route” and buy a no-name foreign light, you will likely wind up buying a top end primary light eventually anyway, so why buy twice?
Price wise, buying a good primary light means you’re probably looking at spending at a minimum $700 and more likely around $1200. I know that is difficult for most of us, but as I said up front, primary lights are life support, how much is your life worth? If you look around, you can probably find a good deal on a used light by one of these manufacturers too – I have a friend that bought an older technology HID light for $350 because he was patient.
Whew, now that that is out of the way, let’s talk about some specifics of what to look for in a light.
Handle
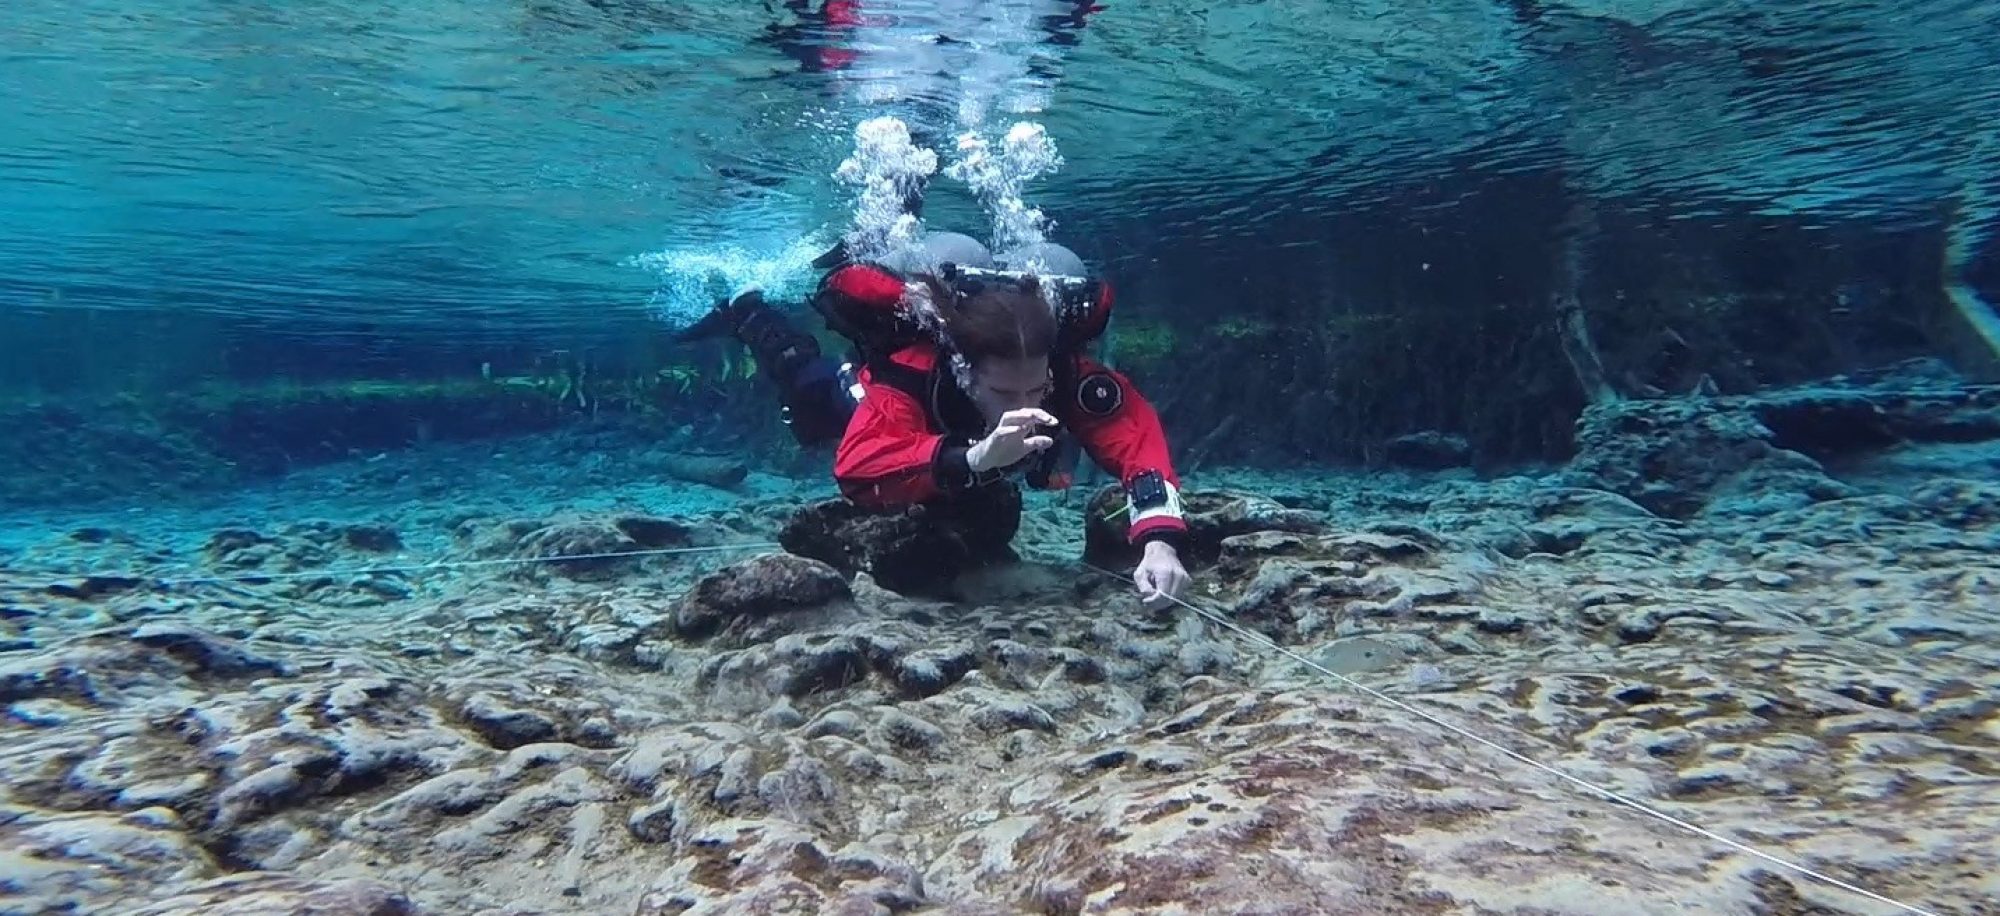
I’m a firm believer that you want a light that has a “Goodman” style handle. This means that light head rests on top of your hand, rather than being held in the palm of your hand. The advantage to you is that you will be able to use your fingers to grab and hold things while you are still using the light.
Goodman handles come in either hard or soft types. I personally prefer a hard Goodman handle that is adjustable to the thickness of my hand. The advantage to the hard handle is you can very easily swap back and forth from left to right hand and it rests easily on your hand.
Others prefer the soft handle because, well, it’s soft and they find that more comfortable.
You will need to decide for yourself which you prefer, hard or soft Goodman handle.
Canister or Handheld
When I started cave diving our primary lights had very large lead acid battery packs that were very very very heavy. We had no choice but to have the batteries in a canister and a light head that was connected by a cord.
With the advancements in batteries and LED emitters that we’ve had in the past decade, this is no longer the case and there are some excellent handhelds on the market.
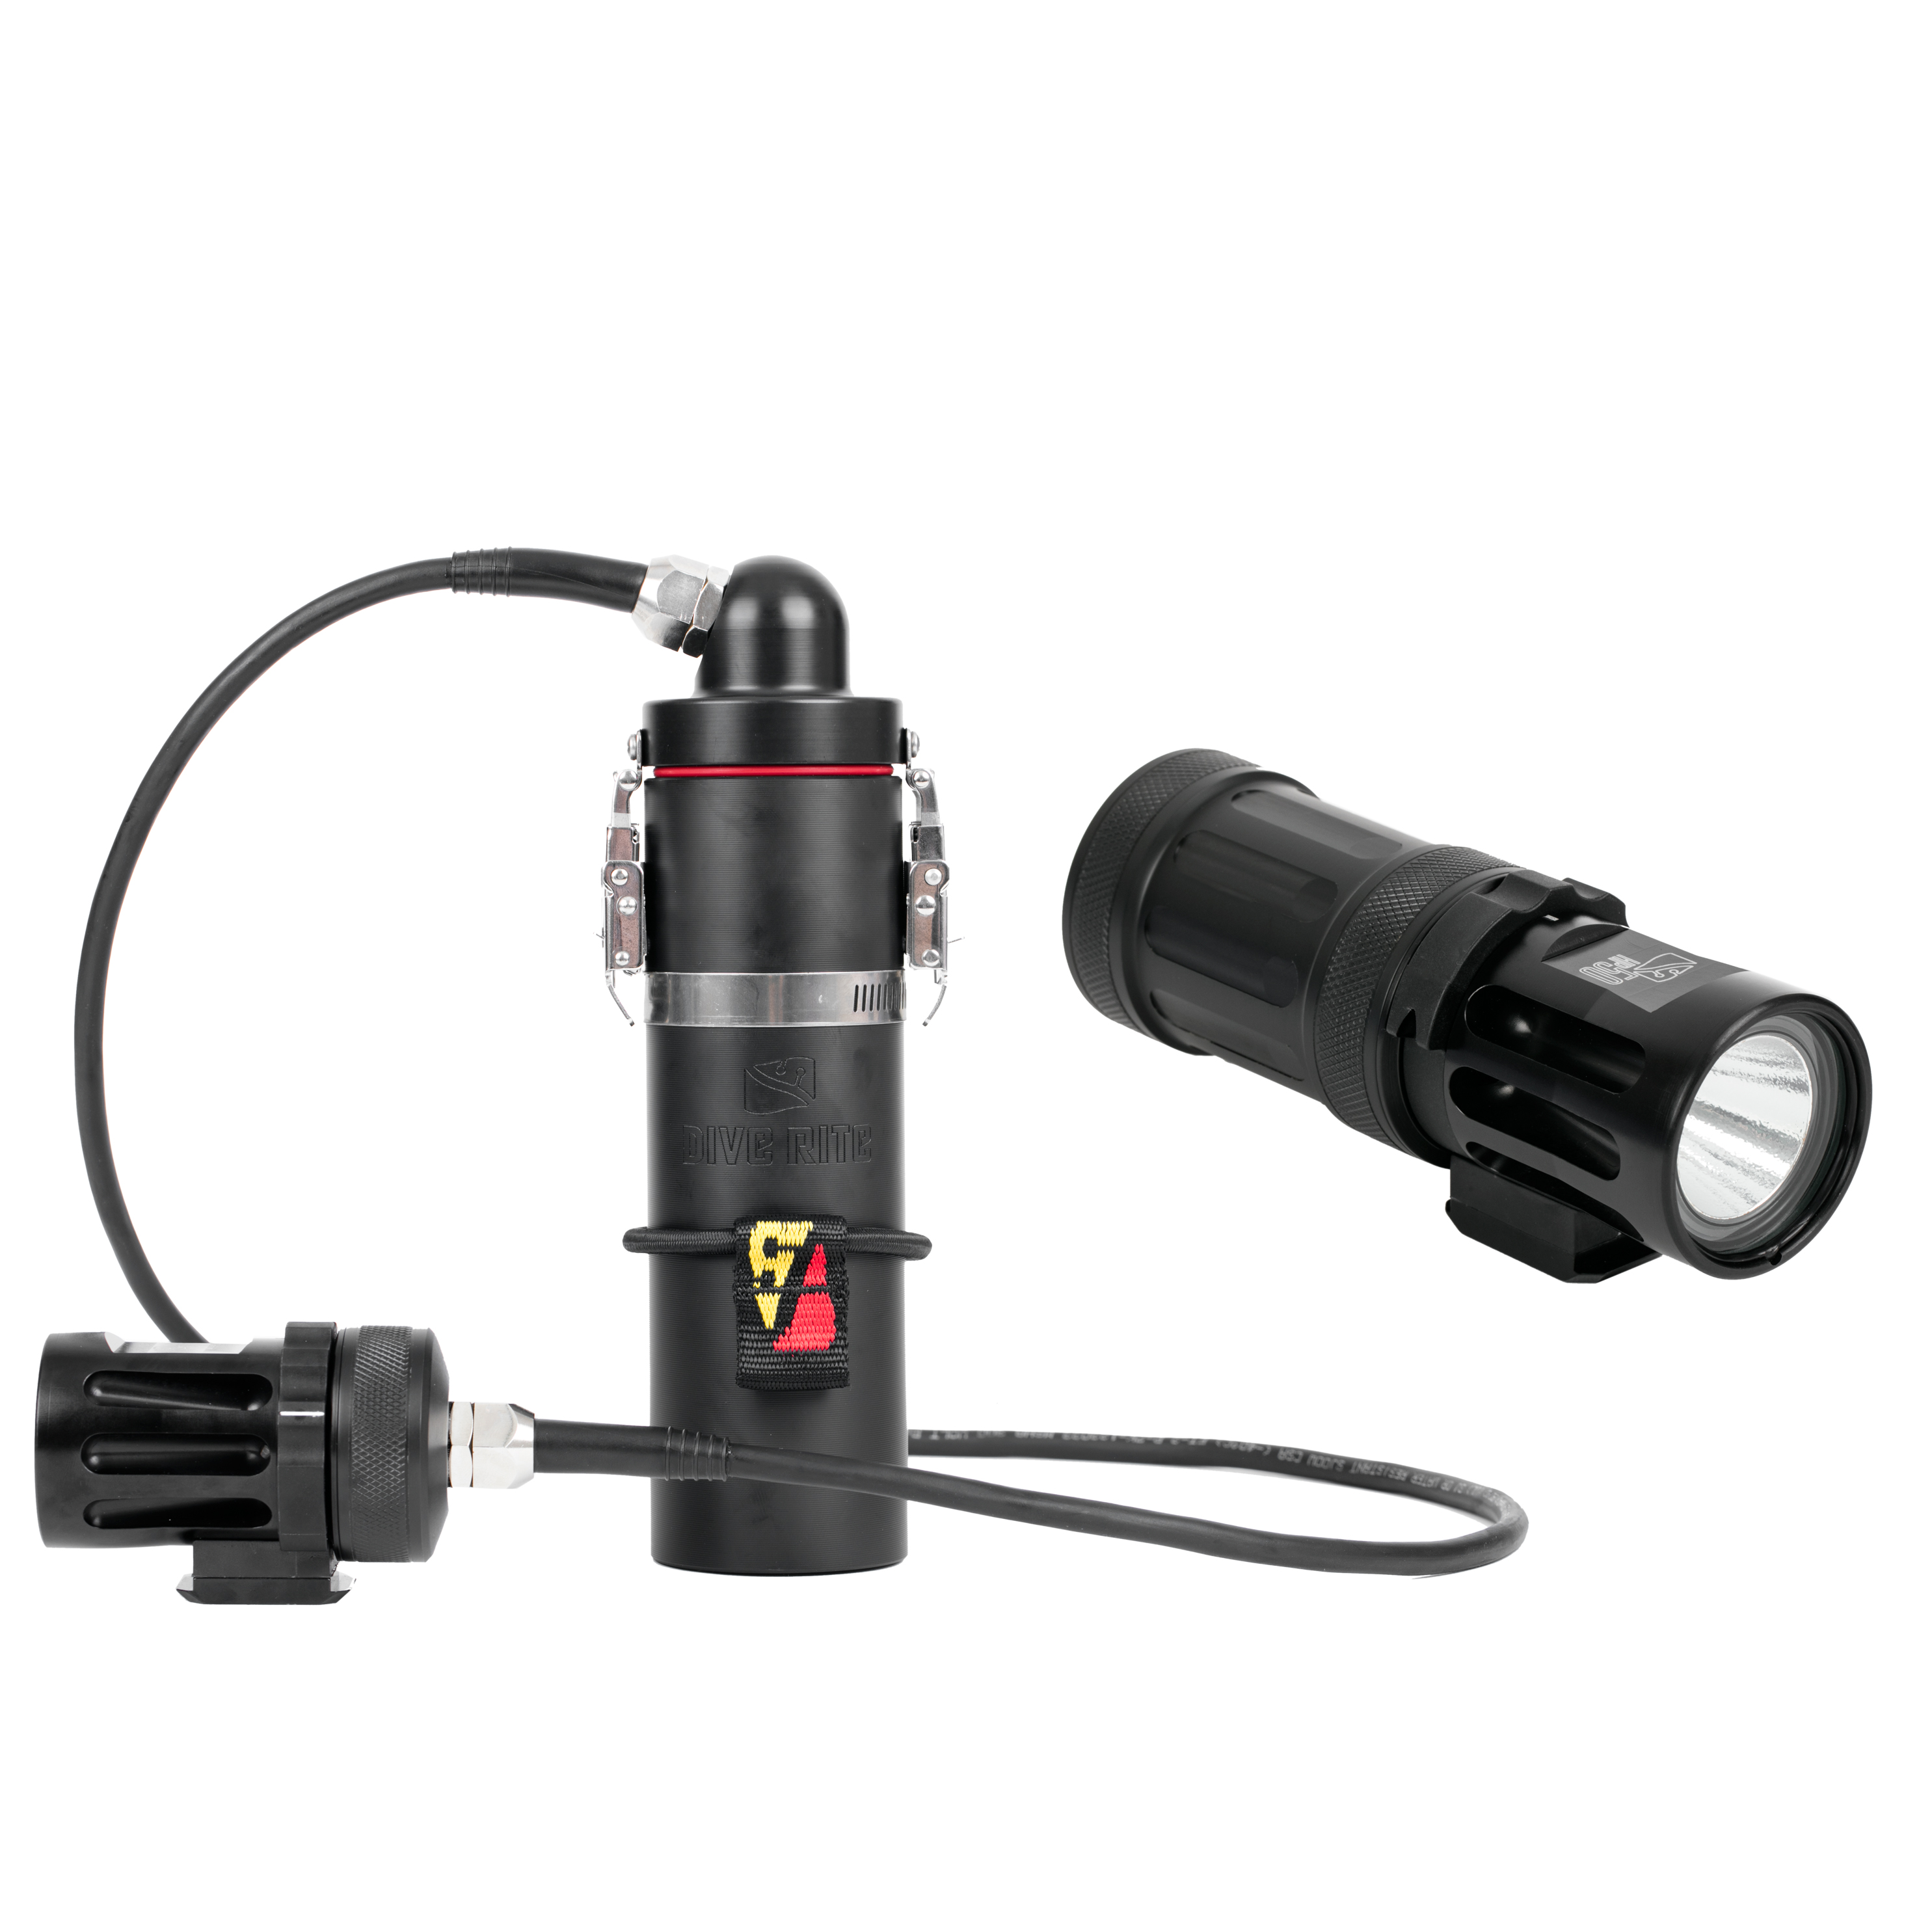
The new Dive Rite H50 can be converted from a traditional canister light to a handheld
Some of the pros to having a handheld light are that you do not have a light cord that is a potential failure point and they’re small enough that you can keep an extra one in a pocket in the event of a light failure.
The trade-off is that the entire light is encapsulated in one package and there is more weight on your hand.
Personally, I am still using a canister style light, but I can see myself picking up a handheld in the not too distant future (are you listening Santa?).
Canister lights have a couple of advantages and disadvantages over handhelds too.
First, and probably most important, is that they can handle much larger battery capacities which means you can get more dive time out of them. However, with most handhelds providing a three to four hour burn-time, this may not be a big consideration for the majority of divers.
The second advantage is that most battery packs can be fitted with an E/O connector. The E/O cord allows you to unplug the head from the canister underwater. A pro to this is that you can swap the head in the event of a failure, but the cons to this are that you may accidentally unplug the light head if the cord gets caught on something (been there, done that) and the E/O connectors can corrode if you regularly take them into salt water. One serious advantage to the E/O connector is that you can also use the battery pack for something else, like a heated undergarment or with a different light head. Once again, this may not be a big advantage for most people, but it is worth noting and these are some of the reasons why I’m not ready to get rid of my canister lights just yet.
A third benefit is that in the event you drop your light head, a corded light will still be attached to you by the cord. Of course, as I said above, if you’re using an E/O connector it is possible for the head to pop off from the battery and to lose the head (yup, I did that one too).
The major con to a canister light is that the light cord is a potential failure point. As I mentioned in the beginning of this article, cave diving is hard on gear. My experience has been that I’m replacing light cords every 18 months, and I have even once nicked one causing a canister flood.
Batteries and Burn Times
Over the years, primary lights have been made with different battery technologies.
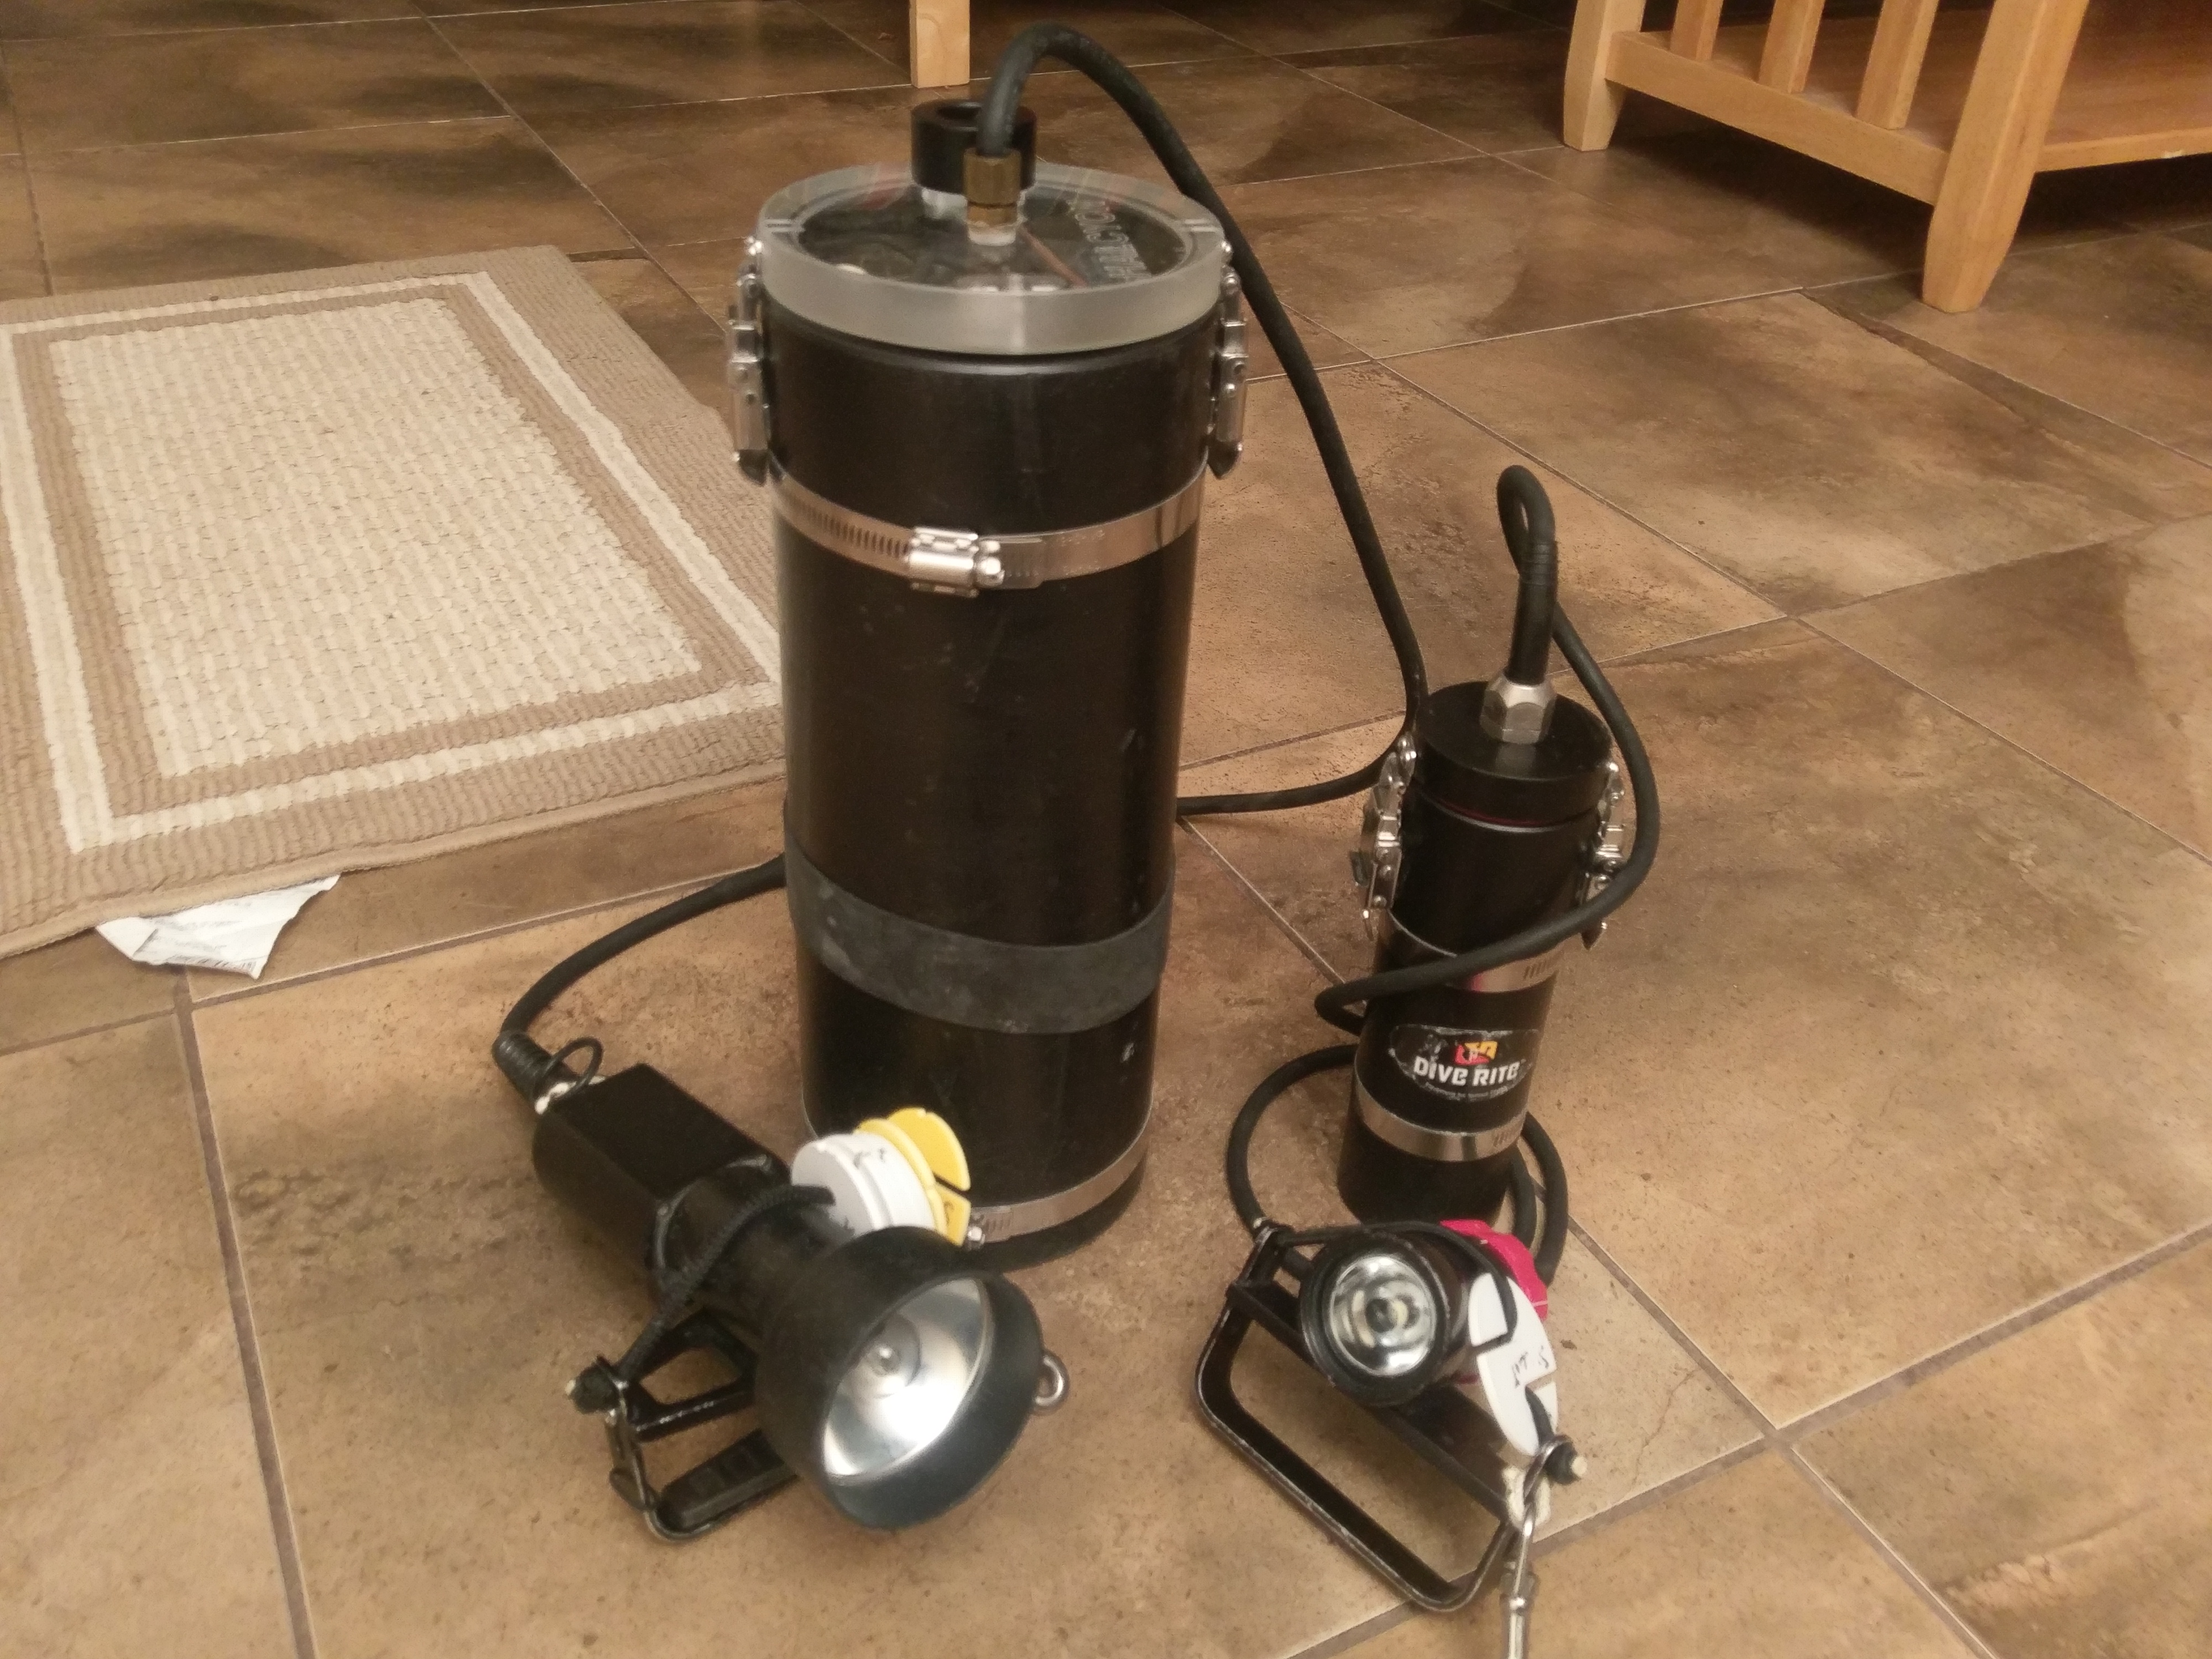
A HID light with a Lead Acid Battery Pack (circa 2000) and a LED light with a NiMH battery Pack (circa 2015). Both lights have an approximately 5 hour duration but slightly different size and weight.
NiCAD batteries, both wet and dry cells, were used for many years, but they had various problems including battery memory. These batteries were replaced by Sealed Lead Acid “Gel Cells,” which were the standard throughout the 90s. The SLA batteries were very heavy, but the batteries did not suffer from memory issues and they were very inexpensive to replace, which was good because you had to replace them annually.
Currently, most primary dive lights are made using either NiMH or Li-ion cells. These cells are substantially more expensive than previous technologies, and are a major part of the cost in today’s lights. Both battery technologies have some unique characteristics that you should be aware of.
NiMH – NiMH batteries do not have the energy density of Li-ion batteries. This means you need a larger physical size to store the same amount of energy. NiMH batteries, if charged and then left unattended, will slowly discharge over time. This means you should top up any NiMH battery pack the night before a diving day just to make sure it is fully charged. NiMH batteries can be cycled between 500 and 2000 times, depending on the cell, and a good NiMH battery pack that is well maintained will last for years.
One major downside to a NiMH battery is that it will generate a constant, or near constant, voltage as the battery is used. This means it is very difficult to detect how much of the battery capacity has been used and your light may function “as normal” until it cuts out without warning because it has been drained. Some light manufacturers have developed circuits that can detect the slightest drop in voltage, and will alert you when the battery is getting close to being discharged.
Li-ion – Li-ion cells have much higher energy density. This means a smaller pack may have a longer burn-time. A fully charged Li-ion pack can be left unattended for extended periods without losing a charge. Li-ion packs have a much shorter usable life-span, they typically start losing their ability to hold a full charge after ~300-400 cycles. Li-ion cells also have a more linear drop in voltage as the battery is used, which means that it is easier to detect when a battery has been used and how much of the capacity is remaining.
One con to Li-ion cells is that the FAA has regulations regarding lithium batteries and you need to make sure you understand the regulations and the impact regarding any particular Li-ion battery pack you may have. While your light manufacturer should be able to provide you with a written statement regarding air transportation and the battery pack for your light, there is an upper limit to what you can take on a plane. Note this means you should not pack a Li-ion battery pack in your checked baggage, but instead you must carry them on with you.
Both NiMH and Li-ion batteries do not fare well in hot environments. Leaving them in the trunk of your car on a hot summer day will damage them and shorten their usable life. Li-ion batteries should not be left fully charged for extended periods of time either, that is bad for the cells.
What about SLA (Lead Acid) batteries? I cannot think of a manufacturer that is currently producing a light with lead acid batteries, however, you may run across a used light that has them. The major downside to SLA batteries is their weight for the amount of battery capacity, but if you are willing to live with that in order to get a primary light for a slightly reduced price, they may be a good option for you. SLA batteries are very inexpensive, I recently replaced a set for $30. They also only last about 100-200 cycles, so you will need to replace them on a regular basis.
What about Lithium-Polymer (LiPO) cells? A LiPO battery pack is essentially the same as a Li-ion cell, but with the battery electrolyte in a flexible bag rather than a rigid container. There have been a large number of fires caused by bag rupture or distortion, just think about the recent spate of Samsung phone recalls. I consider LiPO cells unacceptable for diving applications because I personally believe the rigors of cave diving will put the cells at risk of damage, meaning they could potentially spontaneously catch fire – yikes!
No matter what battery technology you wind up with, you want to get a light with at least three hours of burn time. Although you may only be doing 1 hour dives right now, it’s very likely to do two or three 1 hour dives in a day, and you want a light that will last for a full days worth of diving. My general rule of thumb is I want a light that will last for 50% longer than my planned dive day, so if you are planning for 2x one hour dives, you want at least three hours of burn time.
One thing is for certain, you will eventually need to replace the batteries and periodic testing of the health of the batteries will allow you to know when you need to replace that pack. I try to burn test my lights at least once every six months and at the bare minimum I test them annually. There are multiple ways to test a pack, including using specifically designed battery test gear, but I prefer to use a low-tech method that gives me accurate and reliable numbers and did not cost me much to assemble.
My simple test consists of filling a 5 gallon bucket with water, turning on my fully charged light and placing it in the bucket. I then start a stop watch and keep periodic tabs on the light until it dies. For the first 90 minutes I ignore the light, but after that I begin checking it every 20 to 30 minutes to make sure it is still working. Once I get within 30 minutes of the expected burn time, I begin checking it every 5 minutes.
After the burn test is complete, I re-charge the pack and make a note of the burn-time in a log-book that I keep for this purpose. This allows me to compare the health of the battery to the previous burn test, and I can proactively replace the batteries when the burn test gives me 80% of previous tests.

The author burn testing a lead acid battery pack. The bucket of water prevents the light head from getting damaged by overheating.
Lumens versus Lux and Lord Kelvin
Pay close attention to advertising that describes a light by Lumens and advertising that talks about Lux because those advertisements are describing completely different beasts with different numbers (700 lumens, 10,000 lux). Making sense of what those numbers mean would require a PhD in optical physics, or at least it feels that way sometimes, but I’ll try to explain this in an easy to understand way.
In simple terms, “lumens” is a measure of the total amount of light output, and “lux” is a measure of how much of that light output hits a fixed target at a set distance away. Comparing lumens numbers is pretty straightforward, but when comparing lux it is important to also make sure you are comparing the distance from the light source. One vendor may advertise their lights with a lux rating based on a 3m (10’) distance and another may advertise it with a 1m (3’) distance and those numbers would be drastically different.
Although higher output numbers seem like they should correspond to a “brighter” light, this is not necessarily the case for a couple of reasons:
- Light output is determined by the total amount of light coming out of the front of the light.
- Peak beam intensity represents brightness as perceived by the human eye, and it is related to how the beam is focused by the entire system, including the reflector, lens, or optic.
So, which is more important? At the end of the day, what you will likely care about is how much light gets emitted and I tend to believe that when you start going beyond ~700 lumens, the more interesting thing to look at is the Kelvin (“temperature”) of the light. The higher the Kelvin, the whiter the light and once you go above 6000K, the color in the cave will really begin to “pop.” What I mean by this is that the blue in the water will stand out and colors in clay banks will be rich and natural, basically everything will look better at 6000K.
HID or LED
There are two competing light technologies currently on the market, HID and LED.
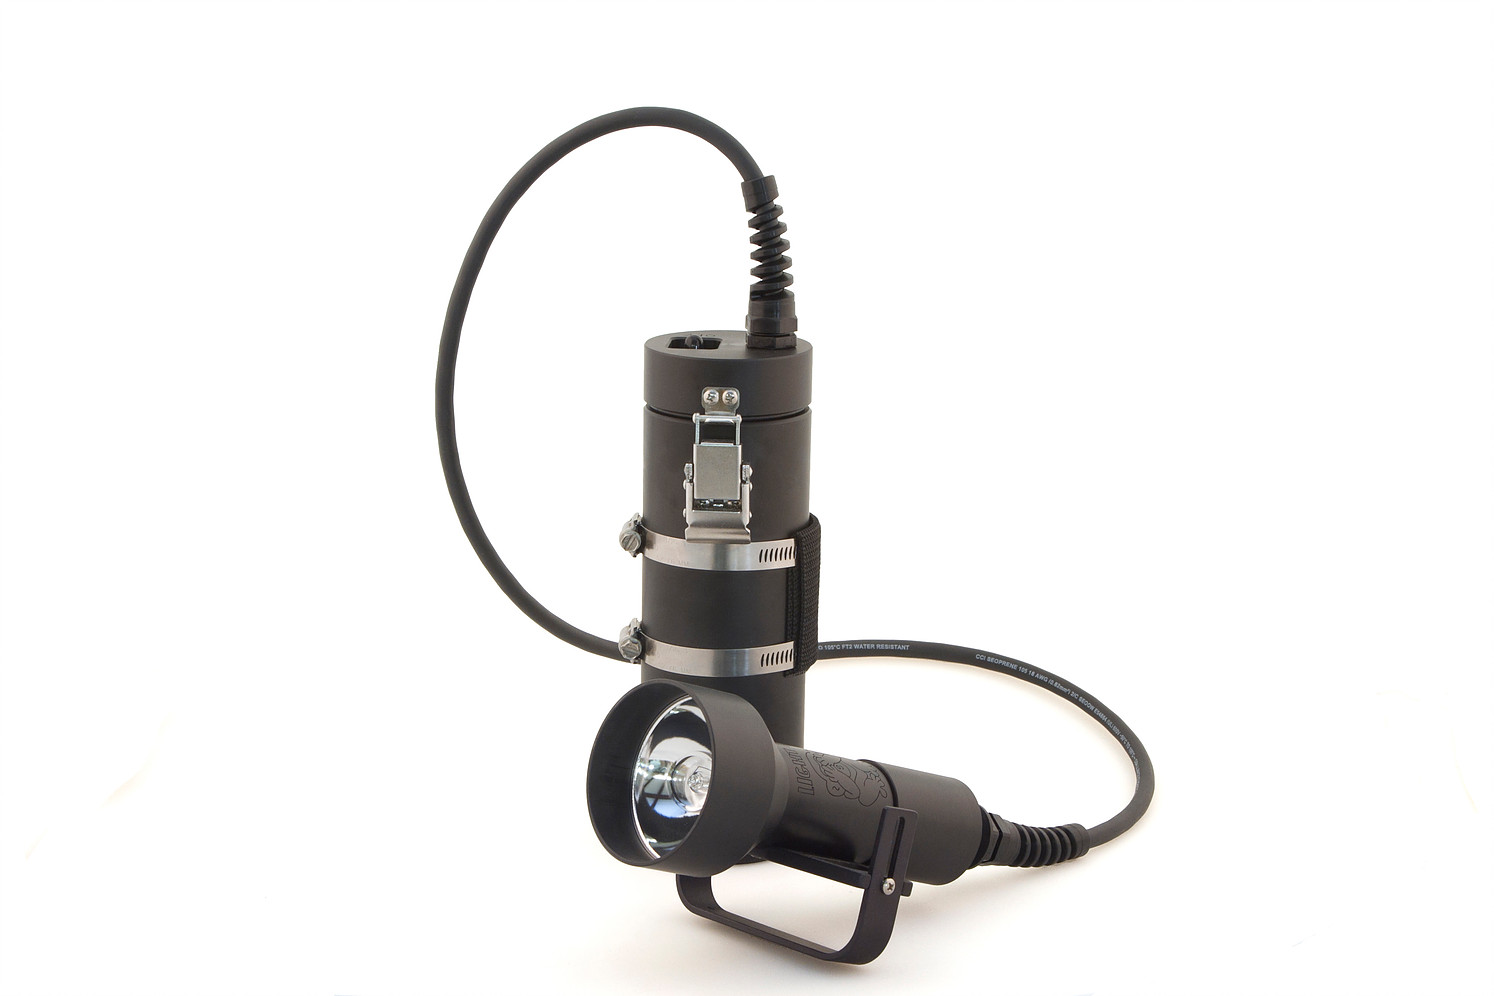
The venerable 21w HID was the preferred light of many for several years
HID uses a gas arc system that requires a ballast to function. The advantages of the HID system are that they are very bright, they operate at a high Kelvin temperature, and the beam can be focused from a broad wide angle to a precision “laser” dot. The down-sides to them are that the ballast or bulb can fail, they have a higher power consumption, and it is expensive to replace a bulb if they break.
LED uses an electronic emitter that is solid-state and robust, it should last for well over 5000 hours before failure. Until recently, the main down-side to the LED lights were that it was nearly impossible to focus them and they lacked the “punch” in murkier water that HID offers. The advantages of LED are that they will last a long time and they typically have a lower power consumption.
Although my primary “go-to” light is currently a 21w HID, I believe that modern LED lights are now at a point where there is no longer a reason to purchase a HID light unless you have a very specific reason for one.
What about Halogen/Xenon? Well, filament based bulbs were very popular years ago, and the bulbs are incredibly cheap to replace, but those have gone the way of the yoke manifold and dodo bird and should be retired.
Spot
In cave diving, we use our lights as our primary means of communication. We know our teammates are with us when we see their light beam and we use our lights for highlighting an interesting feature, signaling OK or signaling distress. Because we use our lights for as a primary source of communication, I’m a firm believer that any light used for cave diving should be able to have a tight focused beam. We call that tight beam the spot. My recommendation is that a primary light for cave diving should have a beam angle of no greater than 8° and a tighter beam, such as 6°, is preferred.
Summary
I started working on this article two months ago, and as I am wrapping it up, two of the manufacturers have just announced new lighting systems which offer brighter lights with multiple battery options for 2017. As I said early on in this article, technology is continually marching forward, but there are a few guiding principles to think about when selecting your next primary light:
- Lights are life-support. Avoid cheap crap just because it’s inexpensive.
- Goodman Handle.
- Battery Technology should be Li-Ion or NiMH with a minimum 3 hour burn time. Burn time is affected by the light head.
- Batteries should be tested every 6 months.
- Should have at least than 700 lumens, with a Kelvin temperature greater than 6000.
- Should have a focused “spot” of no more than 8°; 6° is even better.
Dive safe!